

What Exactly Is Timber Veneer?
Timber veneer is a thin layer of real wood—usually between 0.3mm and 2.5mm thick—bonded to a core material such as MDF, particleboard or plywood. It offers the premium look of solid timber, but is lighter, more affordable, and more environmentally conscious.
And unlike solid wood, veneer can be repaired using gentle techniques that preserve both the structure and the surface finish.
Common Types of Timber Veneer Damage
- Surface Scratches & Scuffs: Often caused by keys, jewellery, cleaning pads or general contact.
- Chips & Gouges: Common around corners or high-impact areas.
- Water Stains: White rings or cloudy patches caused by moisture.
- Lifting or Bubbling: Often a result of poor adhesion or moisture exposure.
- Fading or Discolouration: Caused by prolonged exposure to UV light or heat.
Each type of damage needs a different approach, so let’s break down the techniques step by step.
Tools & Materials You’ll Need
- Fine-grit sandpaper (320–600 grit)
- Wood filler or coloured wax sticks
- Utility knife
- Contact cement or wood glue
- Veneer patch (optional)
- Heat gun or household iron
- Wood stain or furniture touch-up marker
- Soft cloths
- Clear finish (lacquer or polyurethane)
Repair Methods by Damage Type
Light Scratches and Surface Scuffs
Fix:
- Clean the area with a damp cloth
- Apply a wood touch-up marker in a matching shade
- Buff with a soft cloth
- Seal with a light, clear coat
Pro Tip: Rubbing a raw walnut over fine scratches can work surprisingly well—the natural oils help conceal minor scuffs.
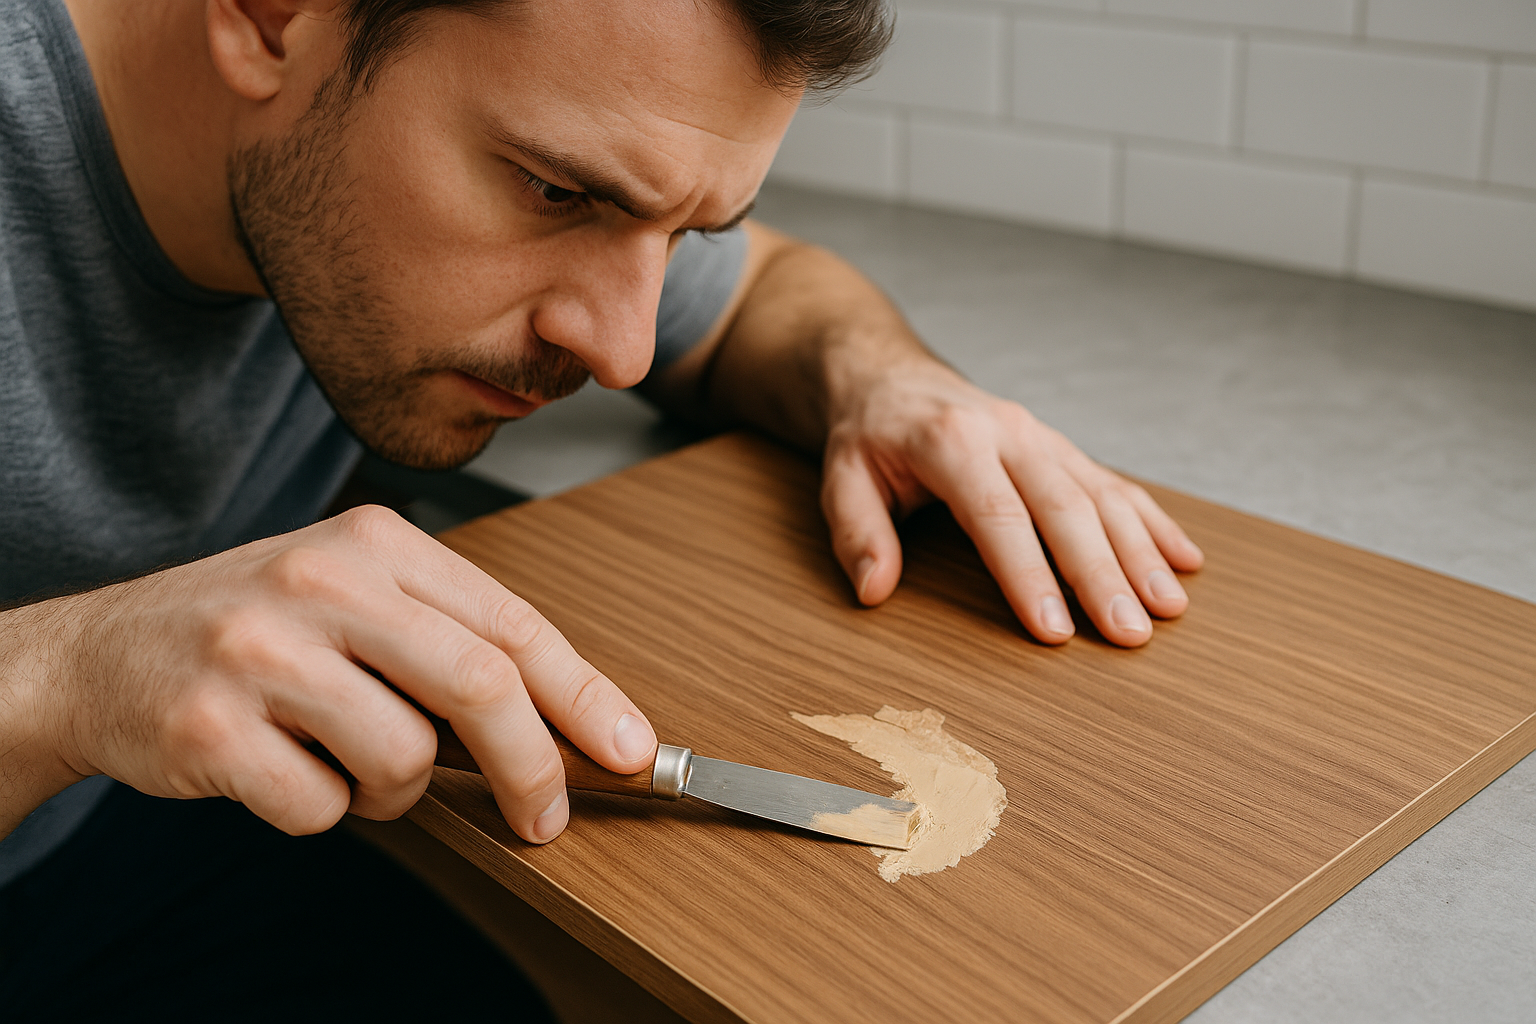
Deeper Scratches, Chips or Dents
Fix:
- Clean and dry the area
- Use a colour-matched wax stick or wood filler to fill the damage
- Let it cure
- Gently sand smooth
- Stain to match and seal with a clear topcoat
Pro Tip: Wax sticks are ideal for chips—they’re easy to apply, don’t require sanding, and blend nicely into the existing surface.
Water Stains
Fix:
- Place a dry cloth over the stain and apply gentle heat with a household iron for a few seconds to lift moisture
- Alternatively, try a mild solution of baking soda and water or a dedicated timber cleaner
- Buff and finish with polish or oil
Note: If the stain remains, you may need to lightly sand and refinish the affected area.
Lifting or Bubbling Veneer
Fix:
- Carefully lift the loose veneer edge with a utility knife
- Apply contact cement or timber adhesive under the lifted section
- Press down with firm, even pressure and clamp until set
- Wipe away excess glue
- Sand lightly, then touch up and seal
Pro Tip: For bubbles in the middle of a sheet, pierce with a fine pin or syringe, inject adhesive, press flat, and clamp until cured.
Replacing a Damaged Veneer Section
If the damage is too severe to fix, patching is a smart option.
Fix:
- Use a sharp blade to cut a clean square around the damaged veneer
- Cut a patch from matching veneer, ensuring grain direction and colour are aligned
- Apply adhesive to both surfaces and press the patch in place
- Clamp and allow to cure
- Sand edges, stain to blend, and seal
Long-Term Care Tips to Keep Veneer Looking Its Best
- Avoid standing moisture: Wipe spills immediately to prevent swelling or staining.
- Use felt or rubber pads: On furniture legs and under accessories.
- Limit sun exposure: Position furniture away from direct sunlight to prevent fading.
- Use suitable cleaners: Avoid harsh chemicals, opt for timber-safe cleaning products.
- Reapply finishes: Over time, recoat with lacquer or oil to maintain protection and lustre.
Keep Your Veneer Looking Sharp for the Long Haul
Timber veneer is one of the best ways to add timeless, natural appeal to any interior—but like anything worth having, it deserves a little upkeep. Whether it’s cabinetry in a high-end fit-out or a much-loved coffee table at home, even aged or damaged veneer can be brought back to life with the right repair methods.
With the right tools, a bit of patience, and some care, you'll restore veneer surfaces to their original quality without needing a full replacement, saving time, money, and waste in the process.
Looking for high-quality timber veneer panels or expert advice for your next project? Explore our range at Bord Products, or get in touch with our team for guidance on selecting the right materials or finishes. You can also visit our resources hub for more expert tips and trade insights.


Explore Bord Products
Our Melbourne facility produces hundreds of veneer and laminate panels daily, giving us total control over timeframes and quality.

Visit Our Showroom
Get expert advice on material selection for your project and see our entire range of veneers and laminates in person.

Specify Sustainable
We support sustainable forest management in Australia and across the globe. Look out for certified products on our website or speak to us.